Shopify apps enable merchants to extend the functionality of their Shopify stores, from adding custom features to improving user experience. Creating a Shopify app can be a rewarding project for developers, whether for personal use, client projects, or listing on the Shopify App Store. This guide will walk you through everything you need to know, from setting up a development environment to deploying your app successfully.
What’s a Shopify App?
Shopify apps enhance the functionality of online stores on the Shopify platform. From automating marketing tasks to adding custom shipping options, Shopify apps allow merchants to tailor their stores to their needs. For developers, creating a Shopify app opens up opportunities to generate income and build skills in a thriving e-commerce ecosystem.
Like Privy that helps stores increase their email subscribers, send email campaigns, and boost sales through popups, flyouts, and banners.

How start building Shopify Apps?
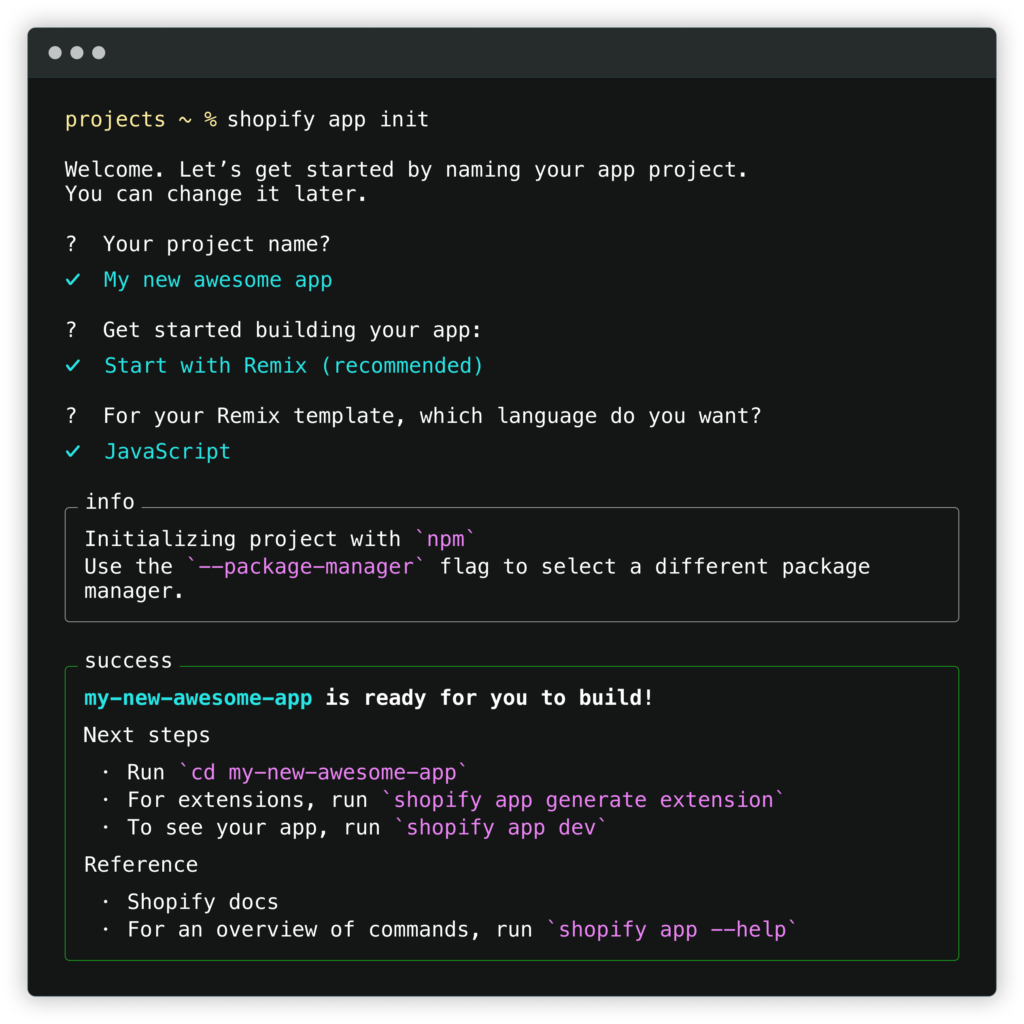
Step 1: Create a new app
First of all you need to have some things installed on your computer. You’ll need:
Shopify provides a CLI(Console Line Interface) to developers for creating apps to shopify. Once you have installed all, you’ll need execute:
shopify app initWhen prompted, enter a name for your app, and then select Start with Remix to use the Remix template.
A new app is created and Shopify CLI is installed along with all the dependencies that you need to build Shopify apps:
Step 2: Running local developent server
After your app is created, you can work with using a local development server and the Shopify CLI.
Shopify CLI uses Cloudflare to create a tunnel that enables your app to be accessed using a HTTPS URL.
- Navigate to your newly created app directory.
cd my-new-app - Run the following command to start a local server for your app:
shopify app dev
Shopify CLI performs the following tasks:
- Guides you through logging into your Partner account and selecting a Partner organization
- Creates an app in the Partner Dashboard, and connects your local code to the app
- Creates your Prisma SQLite database
- Creates a tunnel between your local machine and the development store
Step 3: Install app on development store
You can install your app on your development store, and automatically populate your development store with products that you can use for app testing.
- With the server running, press
pto open your app’s preview URL in a browser.When you open the URL, you’re prompted to install the app on your development store. - Click Install app to install the app on the development store.You now have a development store running with your new app installed:
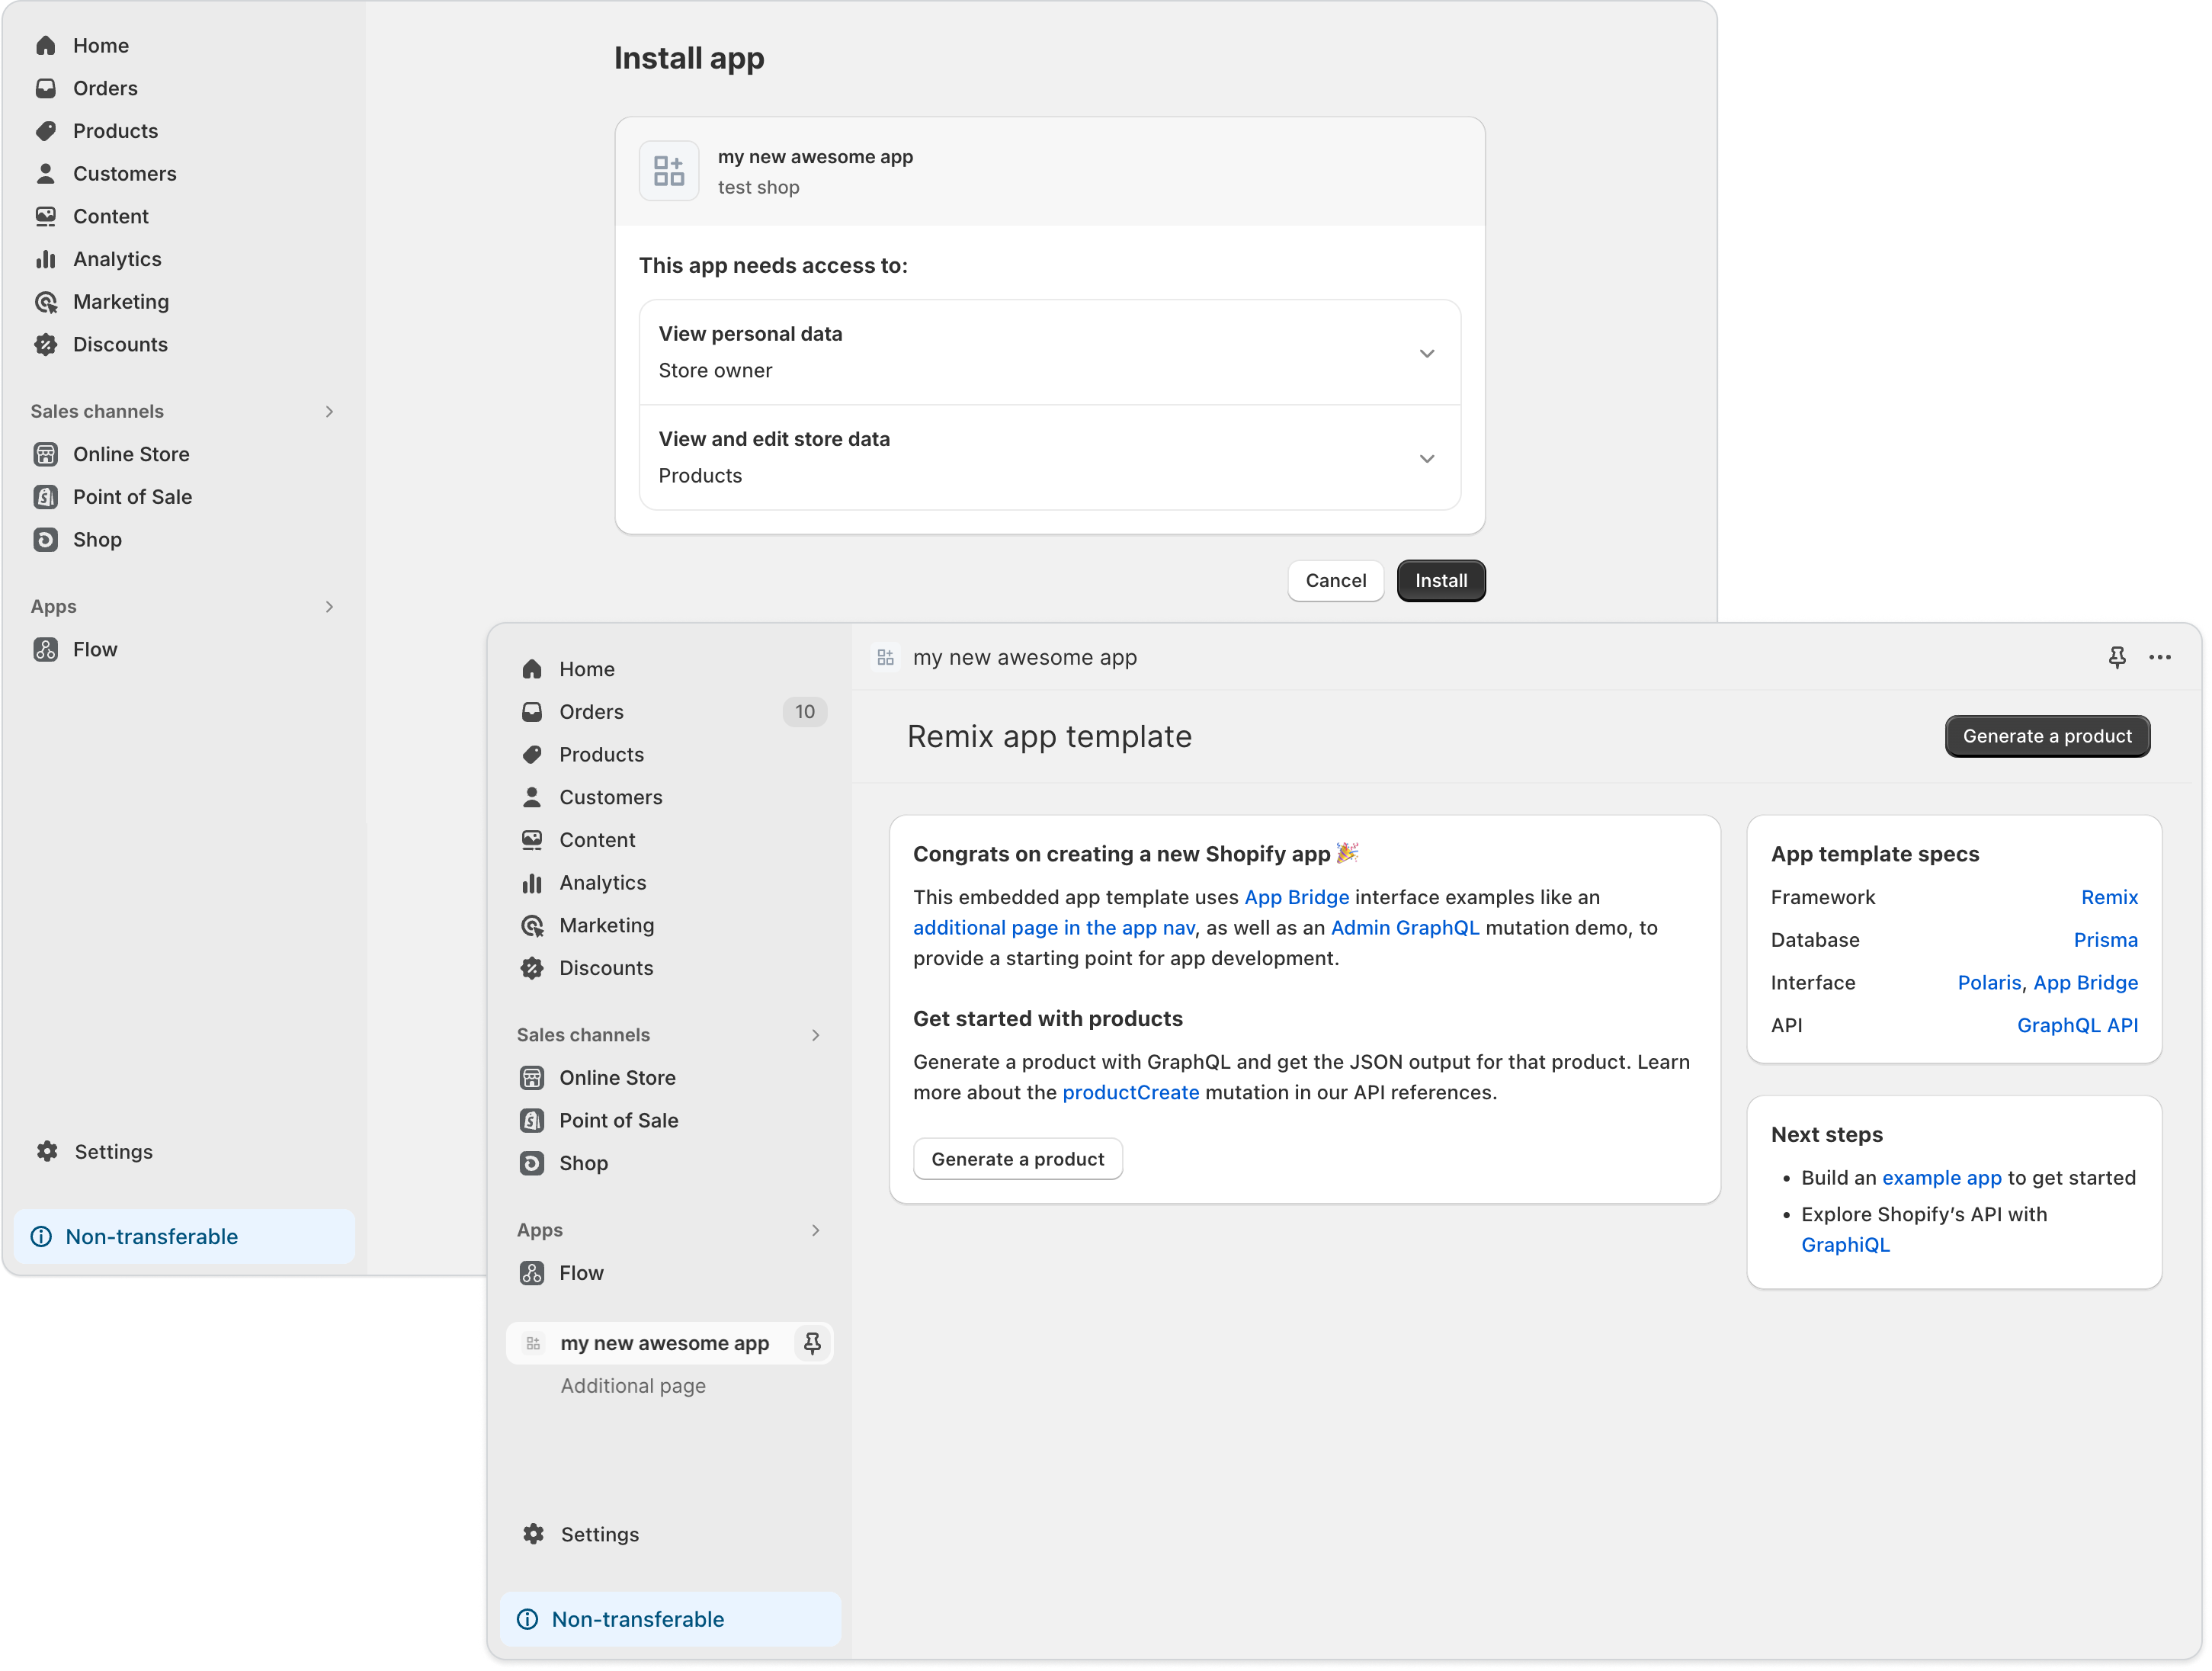
- From the home page of the new app, click Generate a product to create a product for your development store.
You can explore all the app opening the file app_index.tsx and start modifying all the code.
Publishing your Shopify App
Publishing a Shopify app involves several key steps:
- Develop and Test the App: Make sure your app is fully functional, follows Shopify’s guidelines, and is thoroughly tested in a staging environment with test stores.
- Create a Shopify Partner Account: Sign up at Shopify Partners. This account allows you to manage, test, and submit apps.
- Prepare Your App Listing: Write a compelling name and description, add screenshots, and select relevant categories and tags to help merchants find your app.
- Set Up Pricing and Billing: Choose a pricing model (e.g., free, subscription, freemium), and configure Shopify’s Billing API if your app includes paid features.
- Configure OAuth for Authentication: Set up OAuth for secure access to Shopify stores and use it to obtain an access token for API calls.
- Register Webhooks: Implement webhooks to sync your app with real-time Shopify store updates (e.g., orders, inventory).
- Follow Shopify’s Design Standards: Use Polaris for a consistent UI and App Bridge for embedding within Shopify’s interface.
- Adhere to App Store Policies: Review Shopify’s App Store Guidelines to meet requirements on data privacy, permissions, and functionality.
- Submit for Review: In the Partner Dashboard, fill out the submission form, attach any documentation, and submit the app for Shopify’s approval.
- Monitor the Review Process: Shopify may request clarifications or revisions, so respond promptly to emails and address any feedback.
- Publish and Promote: Once approved, your app goes live. Optimize your listing with keywords, run promotions, and engage with user feedback to boost visibility and attract merchants.
By following these steps, you’ll ensure a smoother process for getting your app approved and published on the Shopify App Store.
FAQs
Q1: Do I need to know coding to create a Shopify app?
Yes, basic knowledge of JavaScript and web development is essential.
Q2: How much does it cost to publish an app on the Shopify App Store?
It’s free to publish, but Shopify takes a revenue share from earnings.
Q3: Can I create an app for personal use only?
Yes, a private app can be created for internal use.
Q4: What’s the best way to test my Shopify app?
Using ngrok and Shopify’s test stores for realistic, live tests is highly recommended.
Q5: Do Shopify apps need to be hosted externally?
Yes, unlike themes, apps are hosted on external servers.
Q6: How long does it take to get a Shopify app approved?
Approval times vary, usually taking between 1 to 2 weeks.


Pingback: How to Convert YouTube Videos to Downloads with Node.js › BuildYourselfWithCode